Tuesday, June 25, 2013

Old DVD Case Turned Traveling Coloring Case... Genius!!

We are going on a road trip in one week.  When I say road trip, I mean 12 hours in the car with a four year old who is famous for being bored and a one year old that we can't even manage to keep strapped into a shopping cart or high chair... so in other words, we're screwed!  And it is totally karma... one of my good firends just took her boys 1,300 miles on a trip to a family cabin and as she messaged me the beautiful pictures along the drive I kept telling her how nuts she was taking a two year old and four year old that far in a confined vehicle... why it didnt occur to me at that time that we would be doing something similar just a month later, I don't know... but I do know that WE ARE SCREWED!

So, what is one to do?  Go to Pinterest!!!  I even started a 'Play Time {On the Go}' board to add everything I found to!  But within 10 minutes of searching for 'road trip with kids' I found this genius little idea that I am adding to my arsenal of activities for the trip.  A DVD case turned into a small and very portable AND contained coloring case.  I was instantly in love (so much I dont know if I even pinned it yet!) and began throwing one together ASAP because, as the hubby reminded me before he left for work today, we have seven days to go and we need a list and a packing plan NOW.  I figured this was even better, secretly doing what I love while also preparing for the trip, lol!

Anyway- check out how cute this is!  I am not going to give you step by step directions because Stacy at {handmade by stacy vaughn} did an excellent job in her tutorial on her site.  The only thing I changed was using hot glue to hold everything together and adding a piece of ribbon along the inside.  It took just over a half hour to complete start to finish and the only hard part was cutting out the center DVD part (see Stacy's page to see what I mean!!).  And one thing I would have changed in the future... pay attention to the color of the DVD case... I just grabbed one that seemed sturdy, but now that it is done, I wish I would have grabbed the white case right next to it (really- why I didn't catch that??)!


And big sis is so in love with it... I only got about half way through making it before she knew something was up, mom was making something WITHOUT her help- yikes!  So she helped with all the final touches and put all the colored pencils into the pouch :)

So... with this one little idea added to my bag of tricks... I still need more, lol!!!  If you have any great on the go type of activities for toddlers and preschool, please share the link or idea below... I sure could use them :)


Saturday, June 22, 2013

A Fun Baby & Belly Picture Idea

So yes, little sis is already one... and I still haven't shared this, but I do love how it turned out and wanted to get it up here eventually!  So, here it is, our fun belly and baby picture thanks to my sweet hubby :)

(Click on Picture to Enlarge)

Just a quick how we did it: The pictures were taken in front of our sliding glass door with sun coming in, sheer curtain pulled across.  With a little added light in the editing process, it completely whites out the background.  Once we had both shots, I used Picasa (google's free photo organizing and editing program) to create a collage joining both shots and adding the writing.

 Now my sis-in-law is pregnant and I am on the search for fun and creative belly pictures once again!  If you have any, I would love if you'd share the link below!


Friday, June 21, 2013

Preschool Artwork Collage for the Scrapbook

This was big sis' first year in preschool and and while I knew I wanted to save pieces of work from her year for her scrapbook, I didn't really understand how impossible that would be until I had a whole box full of stuff!!  I decided instead of putting the actual work inside of her scrapbook, I would do a collage of some of her best pieces to put opposite of her class picture.  Picasa (google's free picture organizing and editing program) has an easy-peasy collage tool, so I was able to throw this together in about 30 minutes while the girls played on the back patio this afternoon.  I found a good lighting spot in my living room to take a picture of each of the pieces, threw them onto the computer, did a little cropping and editing, then put them into the collage.  Even better, Costco does cheap 12X12 prints that I can slide right into her scrapbook- double win!!

Now I just have to decide if I am going to keep all her work as well- yikes!!  LOL!  Anybody have any good tips for your kids' artwork and school papers??


Saturday, June 1, 2013

A Shabby Chic First Birthday

Little sis turned one this month.  I had a blast throwing all the details of her party together... a shabby chic sorta affair with a little country garden feel to it.

The Invites
I design the invites myself using Photoshop Elements and use a business postcard printer online to print- for about $25 I can get 50 of these on heavy duty card-stock, rounded corners, and envelopes!  They also print the back- so all the details (and more adorable pictures) go on the reverse side!  Love this little trick to help save money!!
 Making the Banners
I went to our librarian at school to see if she had any discard books (older books usually missing pages) and I was in luck!  I used old book pages, packaging paper (which is kind of a paper bag feel and you can get at any hardware store), and I printed out the letters on 4X6 lustre finish paper at Costco.  To make things go quicker, I used a spray glue I had left over to throw them together- and I loved how they turned out!!
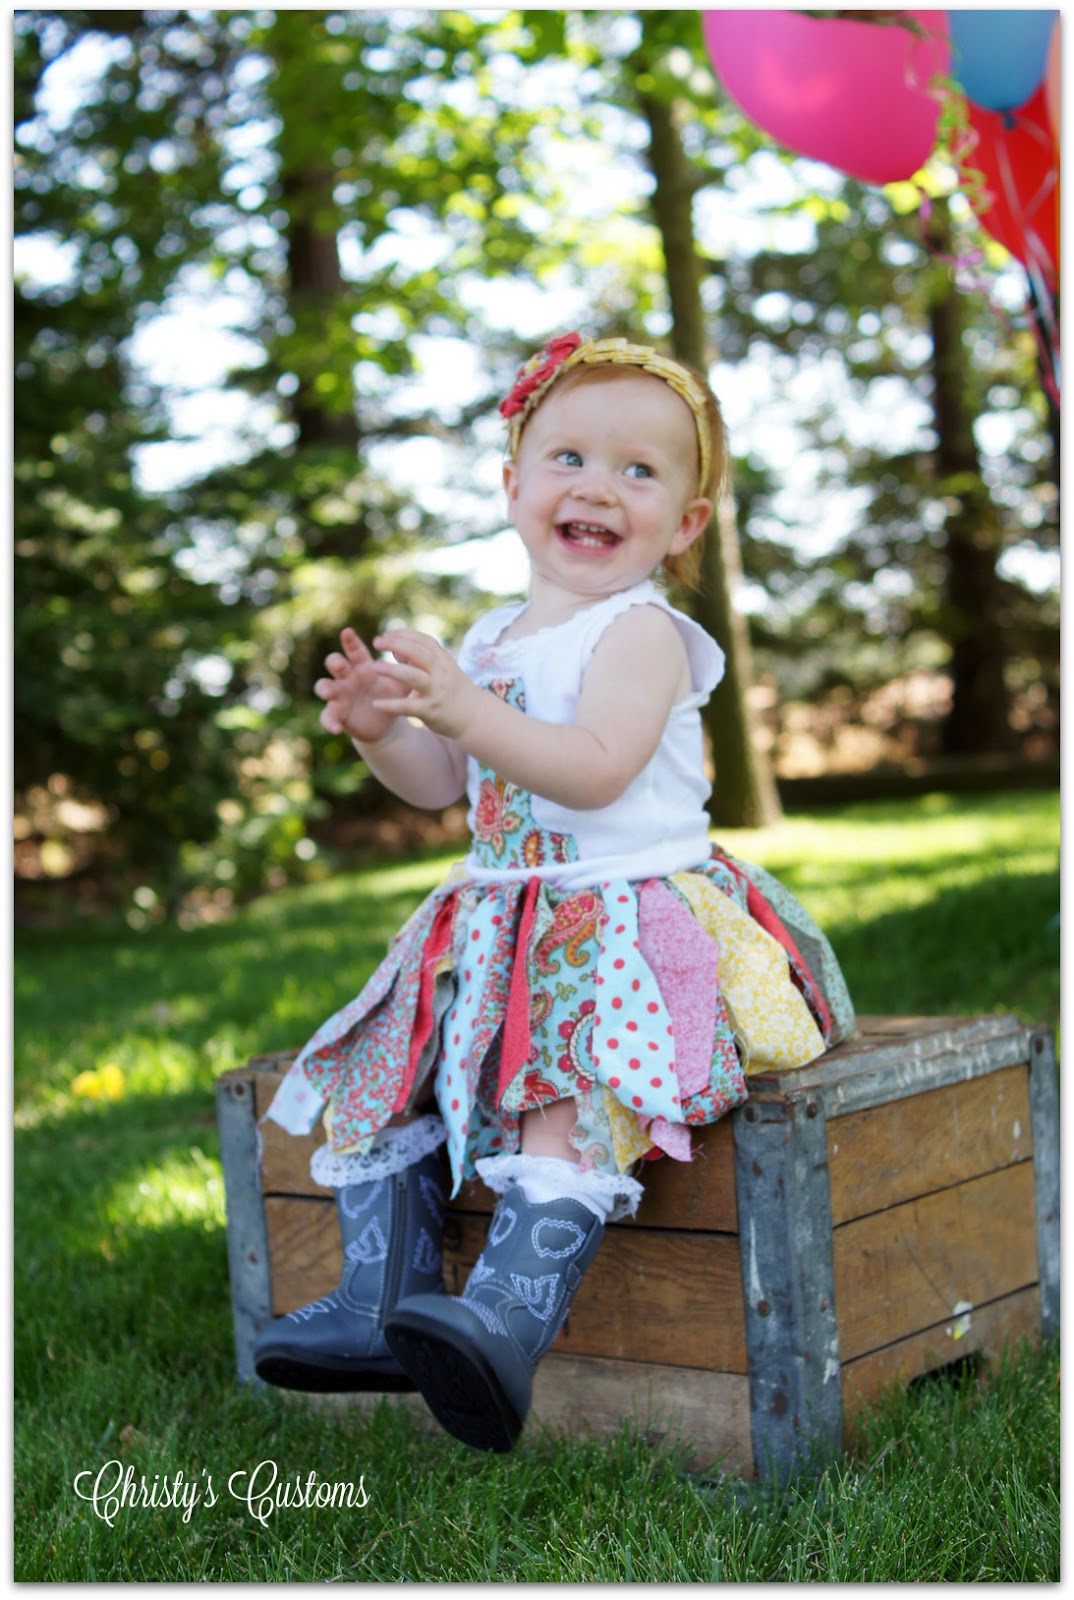
The Outfit
I made this shabby chic little outfit {the tutorial is HERE} for under twenty dollars and only about an hour of time.  It turned out super cute when paired with boots and some ruffly socks!


The Decor
I went with a country garden feel... think burlap, red checkers, and mason jars!!  I found favors in Target's dollar section: hand shovels and rakes, bubble wands, and pin wheels.


The Grub
The hubby got up early to smoke us a pork shoulder... YUM!  So the menu included chips and salsa to snack on, BBQ Pork sandwiches with a homemade Carolina style BBQ sauce, sweet baked beans, salad, watermelon, and a fresh strawberry-cucumber water, lemonade and sweet tea to drink.  The cake was a delicious dark chocolate with strawberry filling with a smoosh cake in white cake for the munchkin... so fun!  A perfect welcome to summer :)


I had a blast putting it all together and most importantly, little sis had a great time with family and friends!!


PS- I am all about sharing... you can download all of the following tags and birthday banner letters HERE (They are JPEG files designed to print on 4X6... I use Costco and choose lustre finish which is similar to matte)!  Just share the love by following my blog :)


Pin It button on image hover