


The Problem: Too many hats, not enough hooks!!

The Materials:

2 to 3 yards of thick ribbon
4 decorative buttons
1 1/2 to 2 feet of rope (I used some thick hemp I already had)
12 wooden clothespins
Hot Glue Gun
How To:
Cut your ribbon so you have two equal lengths. Just over a yard each is what I had. Lay out the ribbons good side down, and place one dowel at the top, one in the middle, and one at the bottom. Glue the ribbon onto the dowel at the top and bottom, wrapping the ribbon around each dowel. Glue the center dowel on with just one line of glue on the ribbon.

Next, turn it over so the good side is up. Lay out your clothespins so they are equally spaced, 6 on one side, 6 on the other (each of mine were 2 1/2" apart). Glue each wooden clothespin down.

Next glue on your decorative buttons at the top and bottom and tie your rope to both side of the top dowel. Use a dab of hot glue to keep the rope knots in place. And, ta-dah! You are finished, that quick and easy!

To hang the hats, simply clip on with the clothespins. Pretty much any type of hat works this way; beanies, sun hats, cowboy hats, and even baseball caps.
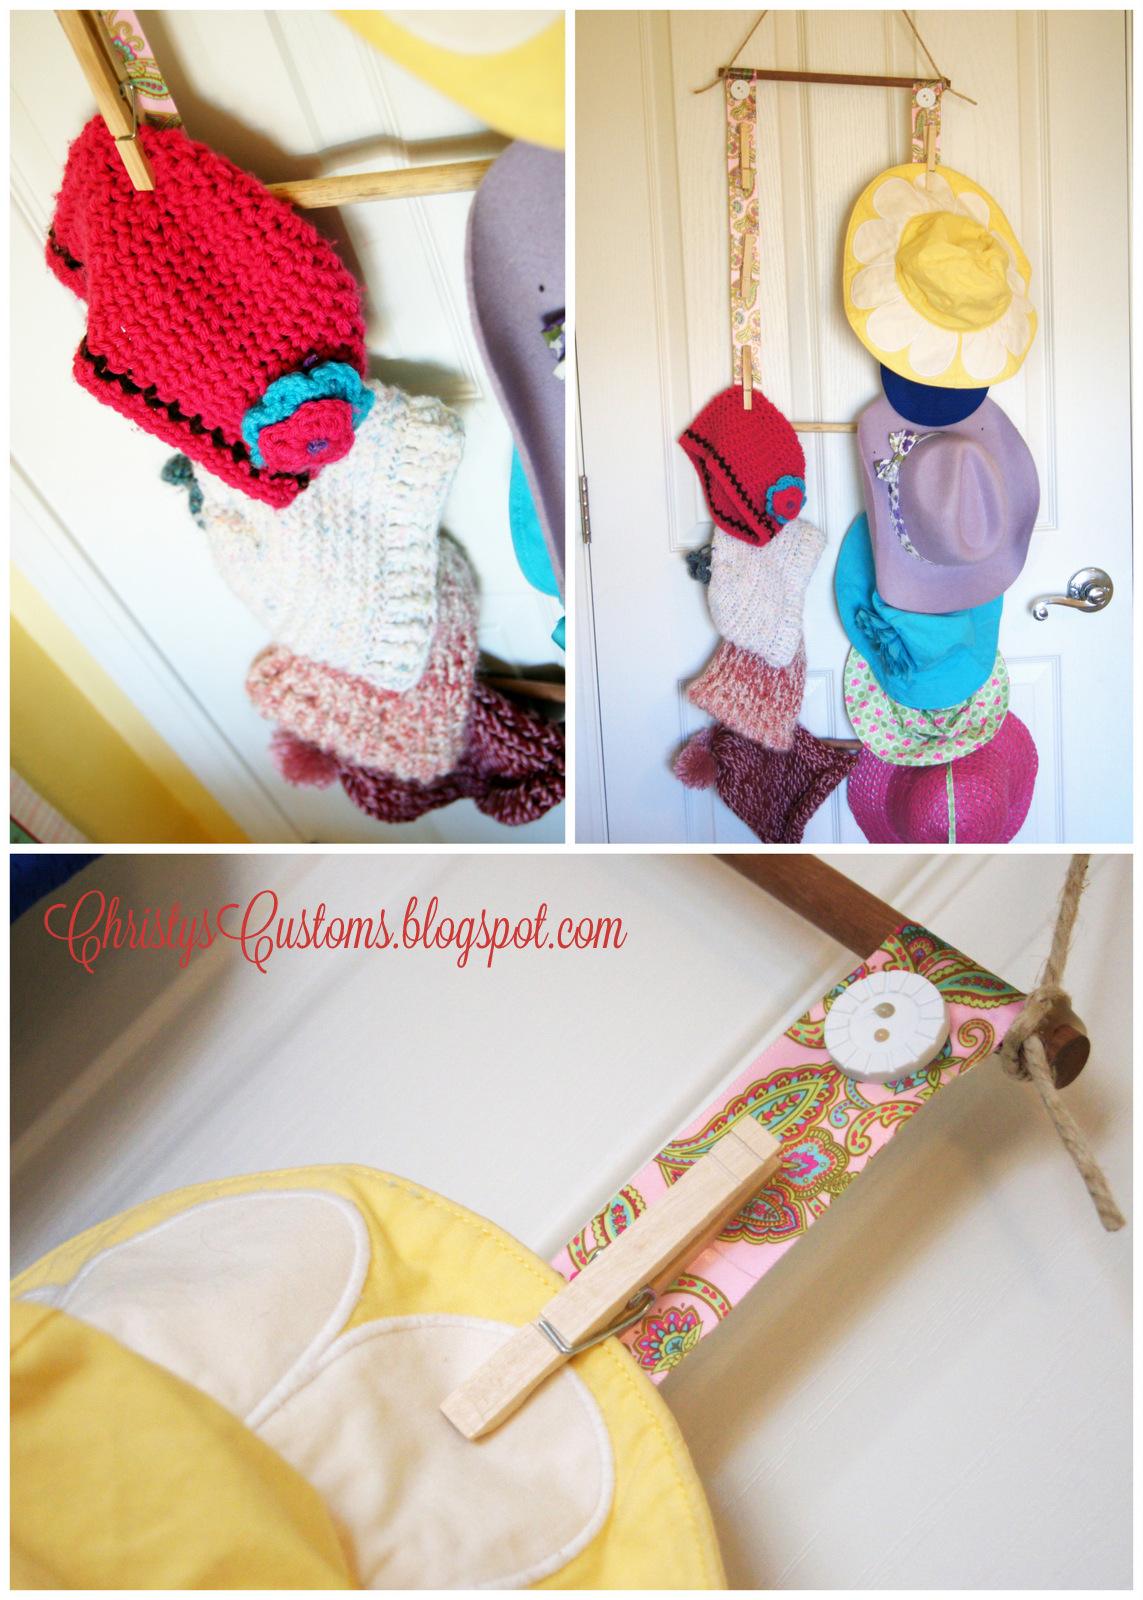
Gone are the days of searching for just one beanie to keep those little ears warm- they are right there on the back of the girls' door!
Are you as over-run with hats as we are!? Who knew girls could accumulate so many hats!!! I am so happy to have this little project done!
No comments:
Post a Comment